Monday, February 10, 2014
Sofa Table Happiness!

Friday I finished the sofa table!
One thing that you may not know about me is that I have a thing for sofa tables ... I love how they ground the sofa, create a division of space, and draw interest to an otherwise boring space.
Ive wanted one for a long time and after searching in stores, Craigslist and Goodwill for months with no luck we decided to make our own.
After developing a tentative plan, we were off to Home Depot and purchased ...
6 1x12 (x2)
8 1x6 (x2)
8 1x4
decking baluster (x4)
8 1x3
(we used some leftover 3/8 plywood for the drawers)
.JPG)
The decking baluster was a great cost saver at $2.49, a comparable parsons leg is around $10 ... I love finding cheaper options that are practically the same thing!
The total for all the wood was around $50
I originally wanted to build something a little simpler, but David really wanted to add drawers and make it a little more complicated ... so I let him have at it! I will do my best to explain, but a lot of it he decided on the fly (feel free to ask if I miss anything!)

First a 1x6 was cut to length and the drawers were drawn with a pencil and cut out with a jigsaw. Since we had to start cutting from the middle, a hole was drilled for the saw blade to fit into.

The frame for the top was constructed

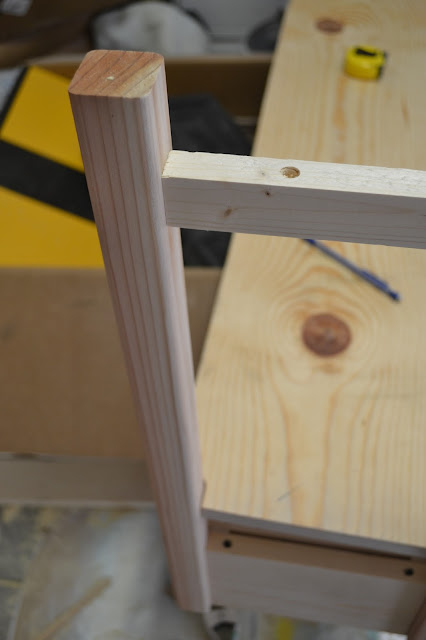
Legs were attached on the corners - a small strip of wood was cut and attached for the bottom shelf to sit on - notches were cut out of the bottom shelf for the legs to fit into and then the shelf was attached

Drawers were constructed out of 1x4s and plywood
Finally the top was secured from underneath with screws

-- Update: Below is a drawing to hopefully make how we constructed the main body a little more clear.

Knots were filled with wood filler and sanded once dry. Holes were drilled for hardware (and later filled with wood filler and re drilled when I changed my mind :)

I started with Annie Sloan Chalk Paint - Versailles ... but decided that it was a little dull so I added a little BM Citron paint that I had left over to give it a little more saturation.
I opted for a simple ring pull for the hardware ... with none in local stores, I decided to try a diy version. When I sent David a text that I was going to Ace hardware to find something to make them ... lets just say that he was doubtful (I can always tell that he questions something will work when he doesnt respond ... I guess not wanting to hurt my feelings?)
Eager to prove him wrong, off to Ace I went - after trying a few pieces, I found a great, simple solution

1. 1" brass ring, brass cotter pin, brass washer with bevel front, simple washer for inside
2. push the cotter pin over the ring (I used a thin ruler to open up the pin, and to get it all the way I pushed it against a hard surface)
3. slide the brass washer (with bevel front) over the cotter pin
4. push the pin through the hole, put the other washer on, bend the ends (I used a large flat screwdriver to get the ends bent and then hammered the rest of the way)
These take about 1 minute to make and a little more to push the ends up, and costing under $2 each, theyre a steal!
Prior to installing, I used a little rub n buff in antique gold to soften the brass
I am loving our custom sofa table and that it is all DIY!

The rug wont be staying, but I do have another planned that is better suited for the space

The bottom shelf will hold office and DIY supplies ...

I picked up the bamboo tray and wire baskets at Target

Love Tulips! They are such happy flowers!

The drawers were lined with a green damask drawer liner

Annabelle in her favorite sleeping spot :)

I redid the lamps about a year ago. They were a translucent black (which was removed with paint stripper) and the shade was covered in a trellis fabric in the same method as this post
I am loving the extra storage and how the table grounds the sofa!
--
Over the weekend we started hanging frames on the long wall in the office / living room (wall in the above photo) and a custom tv stand!
Want to see what I am working on between posts? You can find me at sarahmdorseydesigns on instagram :)
Labels:
happiness!,
sofa,
table
Subscribe to:
Post Comments (Atom)
No comments:
Post a Comment